G.I. Gary Shows You How: Properly Change a G.I. Joe O-Ring

If you’ve ever had the 1980s G.I. Joe figures, you’ve had an O-ring break. With the basic design established in 1982, the O-ring design lasted until 2006 in retail, making this a very common issue. With these figures as old as 35 years, the rubber deterioriates and eventually needs to be replaced. Follow along as I (with generous assistance from Doc and Lifeline) change out Stalker’s O-ring with notes on what to to look for when doing this common maintenance.
 I scored this 1982 Stalker at Terrificon. I got a great deal on it because, not only was the O-ring broken, but he was missing his waist piece. I’ve had his waist for a while and have just been waiting for the right moment to scoop up the rest of the figure for my collection.

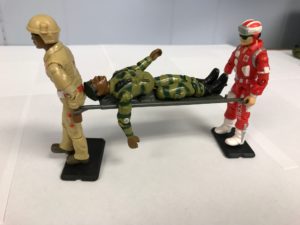
Ok, so Lifeline and Doc are freaking out to see Stalker in such a sad state. He’s loaded up onto the stretcher and it’s off to work.


Destro the arms dealer has a variety of O-rings to choose from! But with 4 sizes pick, which one do Lifeline and Doc need?
There are 4 common O-rings of fractional inch sizes that are used to fix G.I. Joes. (The dash number represents a national standard that I will reference for the rest of the article)
-012 1/2″OD x 3/8″ID (1/16″ cross section)
-013 9/16″OD x 7/16″ID (1/16″ cross section)
-110 9/16″OD x 3/8″ID (3/32″ cross section) (Home Depot / Danco #8)
-111 5/8″OD x 7/16″ID (3/32″ cross section) (Home Depot / Danco #9)
These are the most readily available O-rings. There’s also metric O-rings that were probably used (more on this further down) but they aren’t as easily obtained. There are websites that do sell G.I. Joe specific ones as well. I had a bag and they were exactly the same as the -111’s. I get my O-rings cheaply using manufacturing supplier websites like McMaster.com to buy in bulk of 100. The Home Depot numbers can help you in a pinch if you’re looking for just 1 or 2. Aside from size, one other thing to consider with O-rings is the durometer of the rubber. Durometer is the softness of the rubber, a smaller number is softer. 70A is the most common, and works well. Stay away from a 90 durometer as they won’t stretch at all. Smaller than a 70 will stretch easily, and may not hold the figure in place (think floppy). We’re looking for something that will hold the figures together and not break the old plastic. Sometimes you use the smaller cross section for clearance issues, or less tension.
Common O-ring usage breakdown:
-012 Girl figures (Scarlett, Covergirl, etc.) where clearance is an issue (waists are thinner than male figures)
-013 ’82-’84 figures where the -111 is a super tight fit, 1992s Talking Battle Commanders
-110 Girl figures
-111 Every other G.I. Joe figure
Sometimes people will recommend the -110 in all the early figures. While this may work for them, I have found that this makes those figures extra tight and still difficult to assemble.
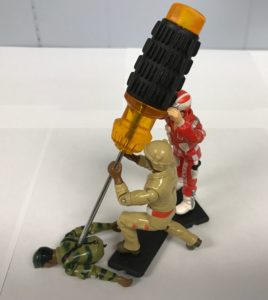 Doc and Lifeline are using a #0 phillips head screwdriver to remove the back screw. Be very careful not to strip or break the screw. Try not to use a worn screwdriver as that tends to strip the head of the hardware. If you strip the head you’ll be left with few options. Some people have luck using a small rubber band over the tip. If that doesn’t work, you will need to drill the screw out. This requires extreme caution as you can damage the torso easily. Also, removing the screw from the chest becomes even more difficult.
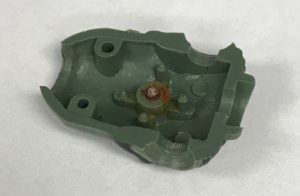 An example of a screw that the head broke off. Similar to drilling the head off, you can see how difficult it is to remove.
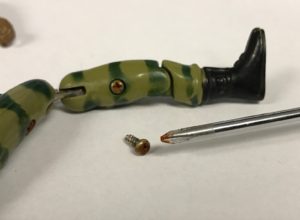 Accidentally lose the back screw? Fun fact: the screws that are used in the legs are the same as the one in the back! I’ve come across a couple variations in screws across all the figures as they have been made in a few factories around the world for so many years. Keeping extra figures for parts comes in handy!
 Here’s what Stalker looks like with the chest piece removed. Later figures will have the shoulder swivels beveled, which provide more room for the o-ring. This feature became common on 1984-1985 figures. I’ve seen ’83 figures with both styles of shoulder swivels, the later releases getting the change as either a cost saving or ease of assembly change.
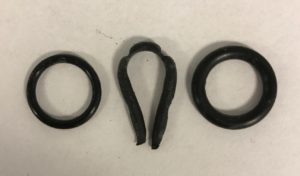 A close up of the -013, original, and -111 oring. Notice how the original is closer in size to the -111 and the pinch marks from being squeezed in between the arms and the back post. After 35 years, its tough to measure a broken o-ring, but the cross section of the o-ring is slightly smaller than the -111, so it would be about 2mm or slightly smaller. Probably an 11mm ID x 15mm OD. I’ve purchased “G.I. Joe” specific O-rings from parts websites, and they could either be the -111 or the metric equivalent, they are that close in measurement.
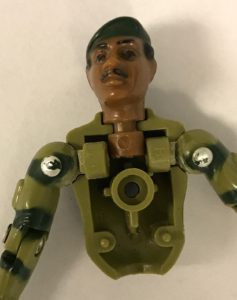 Here’s a close up of the clearance we have for the O-ring. Because it’s tight, using the -013 will be a smarter choice as it will be easier to assemble, and these early figures have brittle plastic.
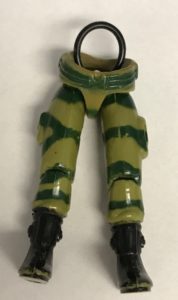 First step of reassembly starts with hooking the O-ring on the leg hooks and sliding the waist piece down. It’s a little easier with the -013 model, but expect some finagling. Be gentle, you don’t want to break the crotch.
 Loop the O-ring around the back’s center post and flip it into the waist.
 Pop the arms and head in. Even with the thinner O-ring, it’s still a tight fit for the arms. Using the thinner model makes assembly easier, the -111 will exert more force and you’ll need both hands to keep this from flipping forward sending the arms and head flying.
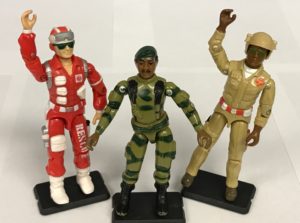 Carefully pop the chest on. Screw the back screw on using care not to strip the screw or the plastic. Once the screw is seated, you’re all done! Yo Joe!
 Stalker can now go back to the front lines, but right now, it’s time to hit the commissary for ice cream and YoJoe! Cola with the ladies.
 Here’s a close up view of the o-rings again so you can better see the difference.
Well, there you have it! G.I. Gary’s definitive guide to changing O-rings on your classic (and maybe not so classic) G.I. Joe figures. Don’t forget if you have questions or comments, leave them below!
Until next time!


©2018 Pint O’ Comics | About Us | Contact Us | Site created by One Flight Up Design